


You want to use your garden shed year-round, in the evenings as well as the daytime, and you want your tools and equipment to stay dry and damp-free. You need insulation.
Here’s your quick guide to the materials and installation techniques you'll need to turn your shed into a warm, dry space, so you can get the most from it.
At a glance:
- Make sure your shed is dry, waterproof and well maintained
- Stop draughts by filling gaps around window and door frames
- Install insulation – bubble wrap, rockwool, PIR boards (Celotex) etc
- Fit board or plasterboard over insulated panels
Make sure your shed is dry and waterproof
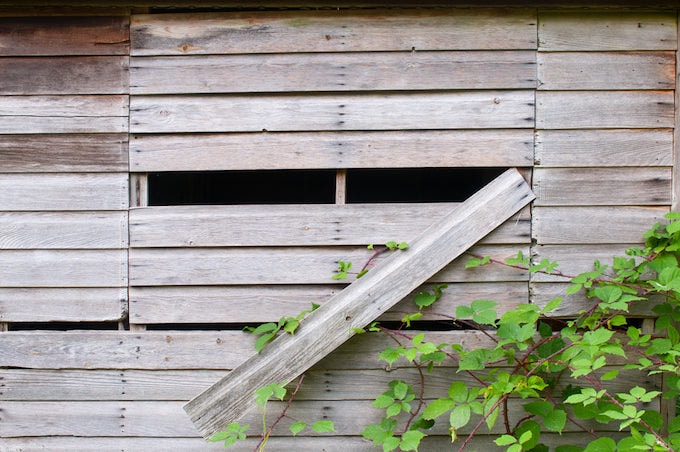
Image: Shutterstock
When was the last time you pulled all your tools and equipment from your shed, and gave the building a thorough inspection? Now’s the time to do it. Pay particular attention to the roof, window and door frames, and your floor supports. The fabric of your building is your first line of defence against the wind and rain.
Over time, roofing felt begins to deteriorate. It needs regular inspection, and though it’s relatively simple to repair a felt roof, it’s often easier to replace it. If your felting is coming up for renewal, consider opting for EPDM rubber membrane. Relatively cheap to install, and 100% waterproof, it’s a very long lasting adhesive roofing solution.
Regular treatment with wood stain should prevent timber from rotting, but if you’ve neglected your shed for some time, remedial action may be necessary. Take a close look at window and door frames, remove rot, and fill with a quality wood filler before sanding back and painting.
Check the floor and replace any boards that are badly damaged. Pay particular attention to high traffic areas like the doorway and walkways between workbenches and tools. Take a look at your floor supports – is your shed sinking into the mud? Subsidence causes your shed to distort, opening gaps which the weather can easily penetrate.
Draught exclusion in your garden building

Image: Shutterstock
Shrinkage, distortion, or simple wear and tear can take their toll as your shed ages, opening gaps through which the wind blows. Door and window frames are areas particularly prone to wind and water ingress.
A simple but effective solution to the issue of draughts around window and door frames is to squirt expanding foam into gaps, cutting off any excess once it’s set. When the problem is ill-fitting windows and doors, adhesive rubber draught excluders are a cheap and effective solution.
If there's still cold air making its way underneath your door, a door brush draught excluder should do the job.
Install insulation in the walls and floors

Image: Shutterstock
Fill the spaces between your shed’s structural frames with insulation material. Consider fitting it to the walls and roof, and if possible to the floor too.
Before you begin, tack or staple a breathable damp-proof membrane to the inside surface of your shed’s outer cladding, and as with any DIY job, whichever insulation material you’re using, always read the manufacturer’s guidelines.
Bubble wrap
The most basic form of insulation, bubble wrap is very cheap and easy to fit by simply stapling it to the inner surface of the roof and walls. The downside to using bubble wrap – even in its more advanced foil backed form – is that its heat and sound insulation properties are pretty feeble. It’s better than nothing, but there are far better ways to go about insulating your shed.
Rockwool
Rockwool is a great insulator, especially if sound insulation is a priority, but it's messy and irritating to the skin and eyes, so take great care when handling it. Always wear protective gloves, glasses and face mask when cutting, or packing it between your shed frames.
PIR insulation boards
Also known by brand names like Celotex and Kingspan, PIR board is a fibre-free, rigid thermoset polyisocyanurate insulation material commonly used throughout the construction industry.
It comes in foil-backed boards of thicknesses between 50 and 150mm or more, and because of its use in the building trade, it’s readily available in widths likely to fit the spaces between your shed’s timber framing. To install PIR boards, simply cut them to size and push into place.
Wool
An environmentally friendly solution, wool offers excellent heat and sound insulation. If you have visions of stuffing your wall cavities with raw fleeces, don’t worry, wool insulation products like Thermafleece are purpose made for the job. Totally safe to handle, you simply trim to size and fit as you would rockwool.
Fit wall boards or panelling in your garden building
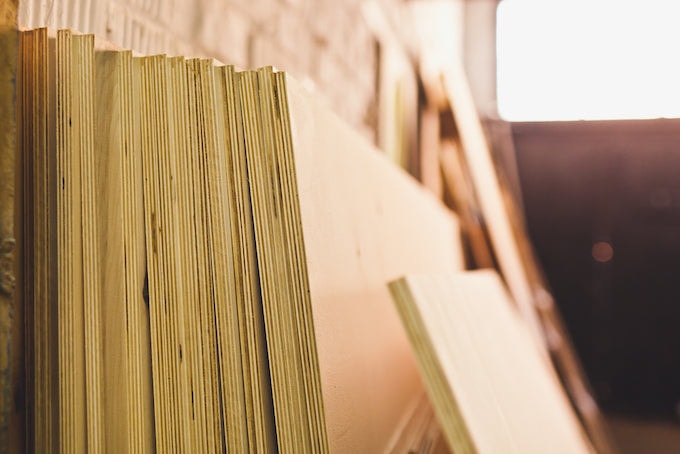
Image: Shutterstock
Now your insulation material is in place, it’s time to board out the interior of your shed. Here are your options:
Plasterboard
Available in 8’ x 4’ sheets, it’s a cheap and effective wall covering, but it isn’t very robust. One hard knock with a lawn mower and you’ll have a hole through the wall. And though it shouldn’t be a problem now you’ve waterproofed your shed, plasterboard offers very little resistance to water or damp.
Hardboard
Available in 8’ x 4’ sheets, it’s a very cheap solution and more robust than plasterboard, but also has little water resistance.
Plywood
Available in 8’ x 4’ sheets, plywood is available in a range of thickness from 6mm upwards – 6 or 9mm ply should prove more than adequate for wall-boarding. It offers a tough surface which should stand the test of time.
Tongue and groove
Available in packs with planks of varying lengths, or as T&G-effect; boarding, this product is more fiddly to fit, but produces a robust and attractive surface which you can either paint or varnish. For most home workshops or tool sheds, tongue and groove is probably too decorative a solution, but if you’re creating a home office, ‘man-cave’, ‘she-shed’, or crafting room, it’s an excellent option.
Pallet board
If you’re insulating an outdoor entertaining room, cladding the walls with reclaimed pallet boards gives you a rustic finish that’s currently very on trend. Remove all nails from the pallet planks and sand with an orbital sander. Stain the planks with two or three different colours to create a non-uniform effect. Then, simply nail the pallet planks to the shed’s vertical struts in a staggered pattern, working from the top down. You may need to add a few more vertical struts before you begin, if they’re spaced too far apart. Ideal as a feature wall to add warmth and texture.
Once your shed’s insulated, it opens up lots of possibilities for different uses. Do you want to make it a place to hang out? Or are you looking to create the perfect workspace? Check out our other 'how to' guides to find out how you can make the most out of your shed.
Share:
How to insure your shed
The ultimate guide to preparing and maintaining your shed for winter