

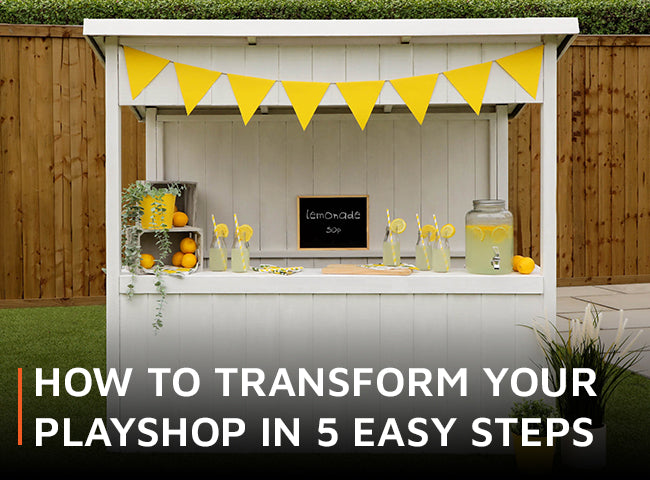
Are you looking to liven up outdoor play? Or, maybe you’re simply after a way to keep your child’s playshop or playhouse in keeping with the rest of the garden? Well, with these 5 simple steps you can give your Buttercup Playshop new zest, just like we have here! Take a look at how we achieved this easy peasy look below!
1. Make a Plan
The key to every successful transformation is to plan. Thanks to the Buttercup Playshop’s super versatile design the possibilities for pretend play are endless. Although, that does mean there can be a lot to think about when it comes to your makeover. Here, are some pointers for you to consider, so you don’t miss anything important.
Choose a theme
Let your imagination run wild. Take our lead and create your own lemonade stand, or maybe dream up something entirely different!
Choose a colour
Think about what colour will suit your theme and garden best. Do you want stand-out colour and contrast, or something to complement and blend into your garden?
Choose suitable furnishings
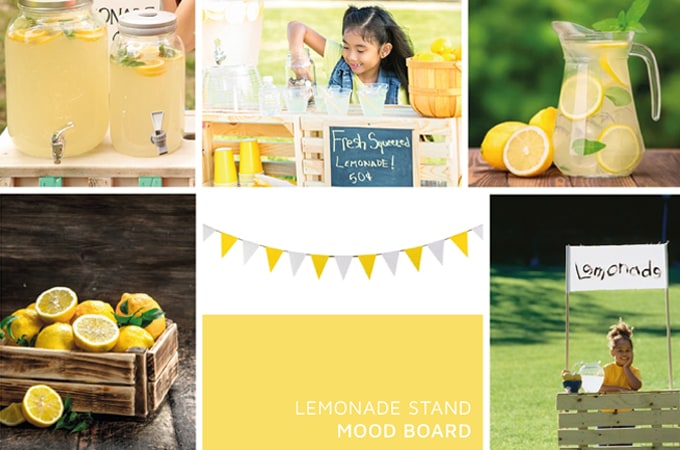
Sadly, not everything is suited to outdoor play. Therefore, double-check that anything you are thinking of using is suitable for the British weather. To tie all your transformation plans together, we recommend creating a mood board. This is a great tool for visualising your finished makeover, whilst providing you with a handy guide to follow when working towards your decorating goals.
If you’re in need of a little inspiration at this stage be sure to check out Pinterest, it’s the perfect place to find everything you’re looking for. - Need a Pinterest refresher? Take a look at our helpful guide on how to plan your garden with Pinterest.
2. Add a Drop of Colour
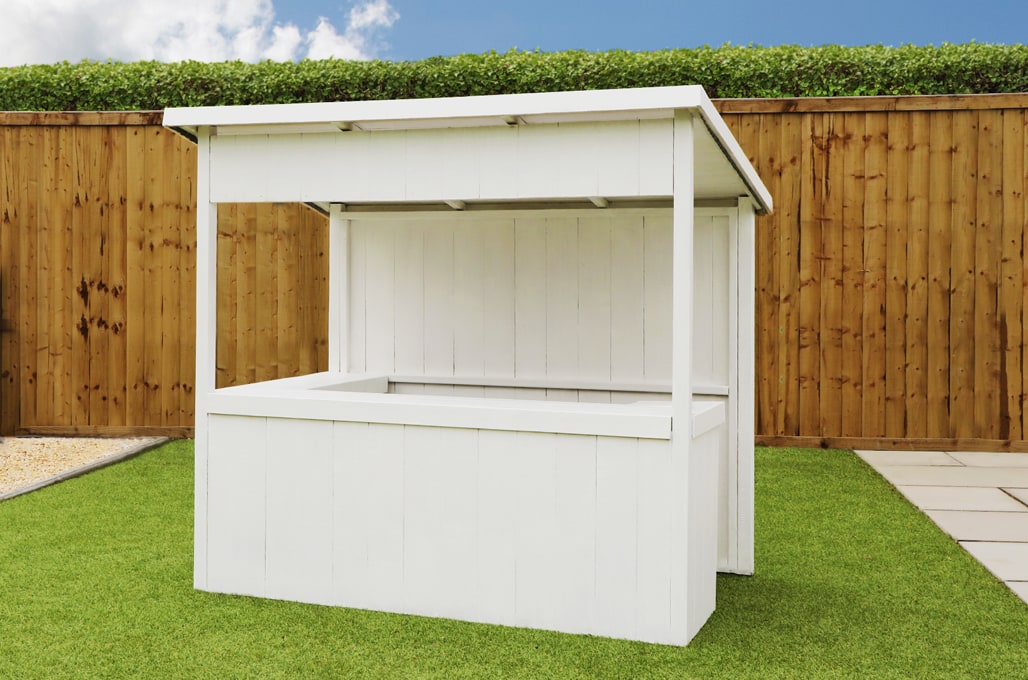
It’s amazing how a lick of paint can completely transform your child’s playshop. But choosing the right colour is super important. When selecting your paint colour, be sure to refer to your original theme. Check that it matches your vision for your child’s playshop, but also don’t forget to think about the needs of the rest of your garden. For example, would you like your child’s playshop to match an existing structure, or are you going to give the playshop its own identity? It’s completely up to you!
Top tip: If you know your child is a little indecisive, then how about choosing a neutral colour that can be accessorised to suit their mood. Meaning today your playshop can be a lemonade stand and tomorrow a bakery!
Make sure your playshop and handy work stand the test of time by using a high-quality wood stain. Take care to read the manufacturer’s recommendations for the product and note any additional treatments the stain may include. As to maintain your 10-year anti-rot guarantee your Buttercup Playshop will require the annual application of a high-quality wood preservative and waterproof topcoat treatment.
3. Get Crafting
Crafting is the perfect solution whether you are on a budget or thinking of ways to involve your little one in their playshop project. Not only is creating your own decorations a fun activity for all involved, but it is also a great way for your child to develop lifelong skills.
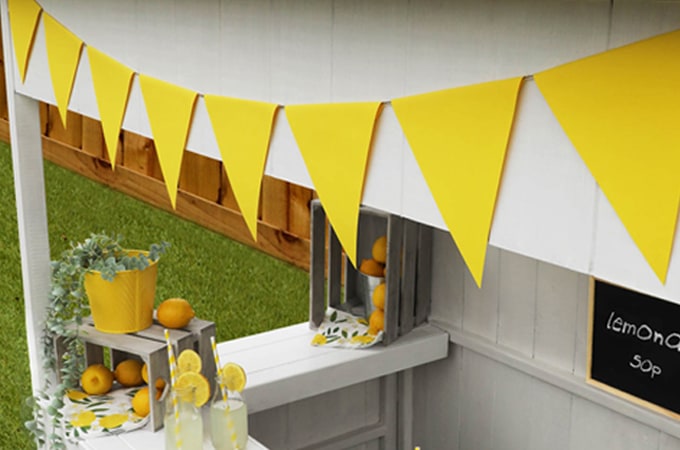
From creative thinking to fine motor skills, your little one is learning so much that will certainly make all the mess worthwhile. If you are a crafting novice start out by creating your own bunting, or maybe if you are a little more experienced try creating your very own sign or props.
4. Let’s Decorate
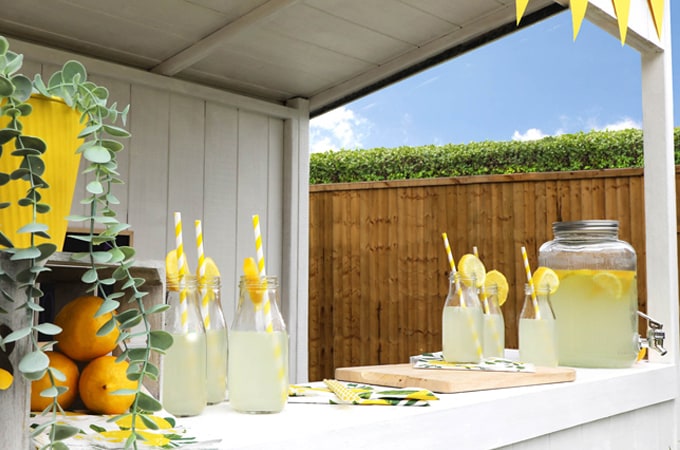
It’s time for all your hard work to start coming together, with a little help from a few accessories. Picking the right props for your little one’s playshop is key to bringing your vision to life. But don’t worry your props don’t have to break the bank! Try utilising items you have laying around the house or even repurposing old toys from your child’s toy box. That’s exactly how we created our lemonade stand here.
By repurposing old partywear and accessorising with plenty of lemons we were able to create the ultimate lemonade stall. Perfect, for any child with a spark of entrepreneurial spirit. Decorating your playhouse in this way is not only great for the environment but it also means it’s super easy to change up your theme. An ideal way to keep outdoor play entertaining all summer long!
5. Time to Play
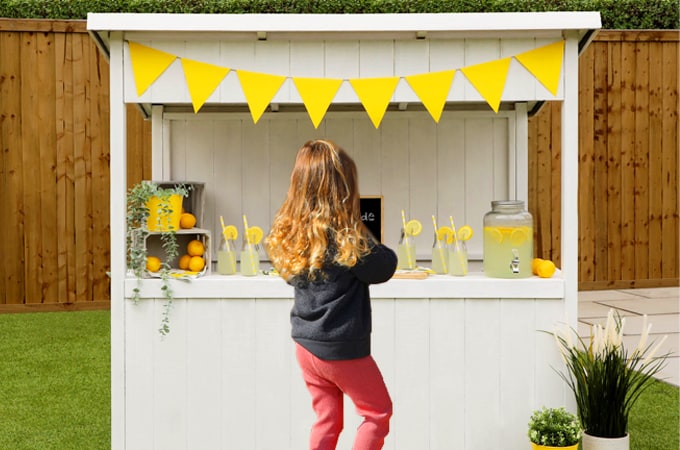
Now let the fun begin by allowing your child to introduce their renovated playshop into a whole new world of pretend play. Watch as your little one brings your creation to life with their own imagination and marvel as they explore every corner of their creativity.
Your playshop is sure to provide hours of fun for your child. However, when you think the time is right don’t be afraid to give your playshop another refresh by following this simple process. Maybe next, your child’s playshop could become the local vets, a florist or even a theatre!
Has your playshop undergone the ultimate makeover? We would love to hear all about it over on our Facebook or Instagram page. Or you can drop your images over to us in an email at marketing@waltons.co.uk.
