


Styrene windows are twice as strong as standard glass, but garden or allotment sheds see a lot of use, and accidents can and do result in broken panes.
To quickly and safely replace a broken styrene shed window pane, simply follow our step-by-step instructions.
- Remove the framing round the broken window
- Take out the broken pane, being careful to avoid sharp edges
- Make sure the replacement pane is cut to size and put in place
- Insert new window into place
- Re-attach framing
You’ll need:
- Screwdriver
- Replacement pane
- Strong utility knife in case you need to score the pane.
1. Remove the framing round the broken window
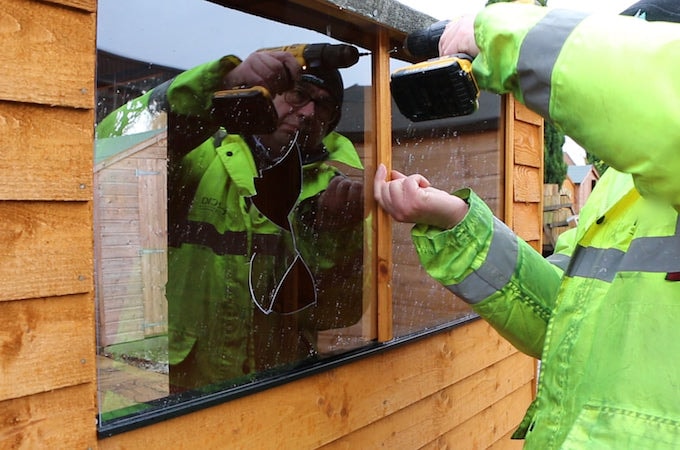
Using a screwdriver, carefully take off the window framing pieces. Take care that broken pieces of window don’t fall.
2. Take out the broken pane
Remove the broken pane. A styrene window pane won’t have shattered but make sure that you steer clear of any sharp edges.
3. Make sure the replacement pane is cut to size and put in place.
Offer up the pane to make sure it’ll fit. If you have a styrene pane that’s too big, cut it to size by scoring it heavily with a sharp knife. Line the scored line up with the edge of a workbench and apply pressure. It’ll break with a bang!
If you have a glass pane, head to your local glazier to get it re-cut.
4. Insert the new pane into the gap
Once you’re sure you have the right size, remove any protective film and put the pane into the gap.
5. Re-attach framing
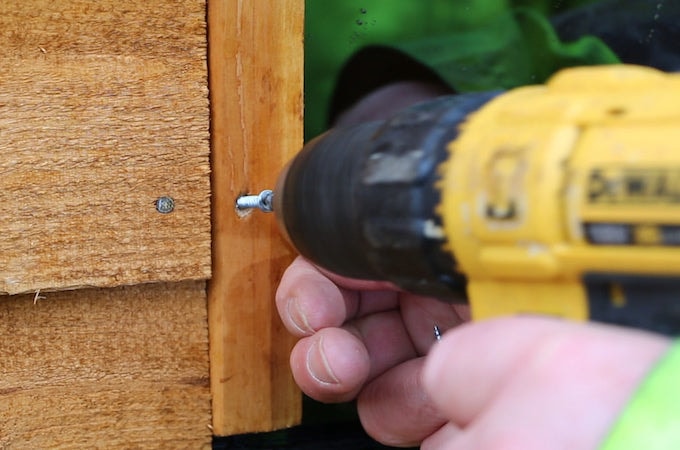
Screw the framing pieces back into place. You should be able to use the existing screw holes. Don’t screw too tightly; you risk cracking or breaking your new pane with the pressure!
That’s it - replacing a broken shed window pane is a pretty quick and simple job. Check out the video below to see how we do it at Waltons!
Share:
How to build a log cabin