


It’s every child’s dream to have their own space to use as a den, clubhouse or hideout. So why not turn an existing or new wooden shed into a bespoke playroom where children can hang out and teens can chill to their hearts' content? With a little insulation, damp-proofing and decorating, your shed can be transformed into anything your kids want it to be. Here’s our step-by-step guide to converting your ordinary garden shed into the perfect playhouse.
Contents:
- What type of playhouse do you want?
- How to plan the layout of your playhouse
- Should you convert an existing shed or buy a new one?
- How to project manage your shed conversion
- 10 steps to convert your shed into a new playhouse
- How to create a playhouse - quick summary
What type of playhouse do you want?
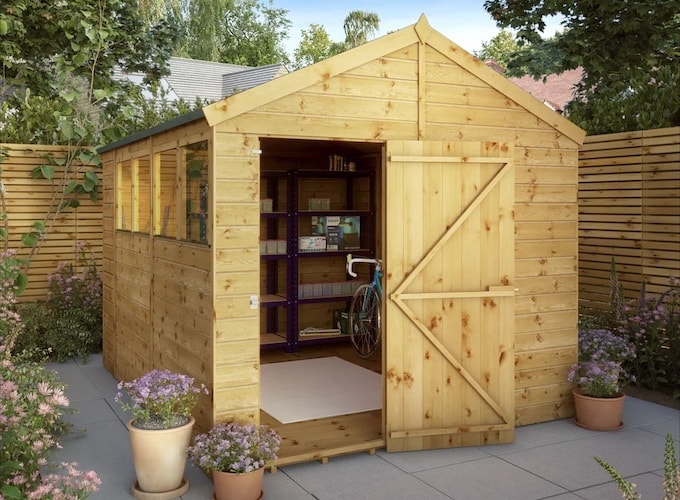
Image: 10 x 8ft Shiplap Apex Wooden Garden Shed from Waltons
First, speak to your children about what they want to use their playhouse for. For example, if they’ll use their playhouse as a place to paint, glue and do crafts, then the shed will require windows that open, or some other ventilation. If they’re older, and plan to use it as a den, they might want some comfy seating, access to the internet and somewhere to watch films. Here are some things to consider:
- Furniture: Once you know how your playhouse will be used, your furniture requirements will fall into place. If they want a special hideaway for reading, then you’ll need plenty of shelving for books, as well as comfy beanbags or chairs. If they love to draw, then you’ll need to make sure they have a table and chair, as well as storage for all their materials. Think about how they’ll use the space. Will they need room for imaginative play? Try to think of everything they might want. You can always trim the list down when you plan the layout.
- Utilities: Deciding whether to install utilities in their playhouse depends largely on whether they will play in it on cold, dreary days. If you wire the playhouse with mains electricity, you can install heating and lighting, making sure they can play there no matter the weather or the season. Heating the shed will also make sure damp doesn’t spread in the building, damaging any toys and books inside. Think about how many power sockets you might need. What kind of lighting would be best? Do you want them to have access to the internet, or would you prefer their playhouse to be offline?
- Design: Most children will love to customise their playhouse both inside and out, making a wooden shed the most sensible choice. They are easy to paint and alter, allowing for the installation of electricity, the addition of windows, or just redecorating as the children grow older and their tastes change. Wooden sheds can have either overlap or tongue and groove cladding. Overlap is cheaper, but tongue and groove is sturdier and more weather-resistant. Although small children won’t make use of the high ceilings provided by an apex shed, this extra space does allow for the shed’s use to evolve as they grow. See our full range of sheds, for inspiration.
- Base: A playhouse needs a strong base. It helps maintain the structure long-term, but also makes sure the shed remains a solid and safe place for your children to play. An inadequate foundation could cause the structure to move over time, letting in the elements and opening up gaps, which could be hazardous to the shed and its occupants. A solid concrete base may be more robust than a playhouse needs, but if you’re planning to reconvert further down the line, or if the shed is large, then do consider this type of foundation. Otherwise, a paving slab base is a straightforward and cost-effective foundation for a playhouse. It isn’t suitable for larger sheds, however, as it can sink over time. Timber decking with concrete anchor points looks good, and can be extended to create a deck around the playhouse for more outside play space. Remember to install a weed-proof membrane between the ground and the timber. This kind of base helps with damp-proofing, as the deck can help water to run off away from the building, and the space between the ground and the shed helps circulate air. Timber bases may not be strong enough to support the largest sheds.
- Position: You’ll want the playhouse to be in clear, unobstructed view of the main house. Are there any young trees that could grow to block the shed from view? Keeping it close to the main house will give you peace of mind, and will allow for easier installation of utilities, such as the wiring for mains electricity.
- Ventilation: Are your children budding artists? If they’ll be working with glue or paints, the playhouse will need plenty of ventilation. The easiest method? Windows that open. But consider a skylight or ventilation shaft if you have safety concerns about small children and trapped fingers.
- Aspect: While the amount and quality of light coming into the playhouse is a concern (south-facing windows offer direct sunlight) you’ll want the playhouse to face the main house, especially if you have small children.
How to plan the layout of your playhouse
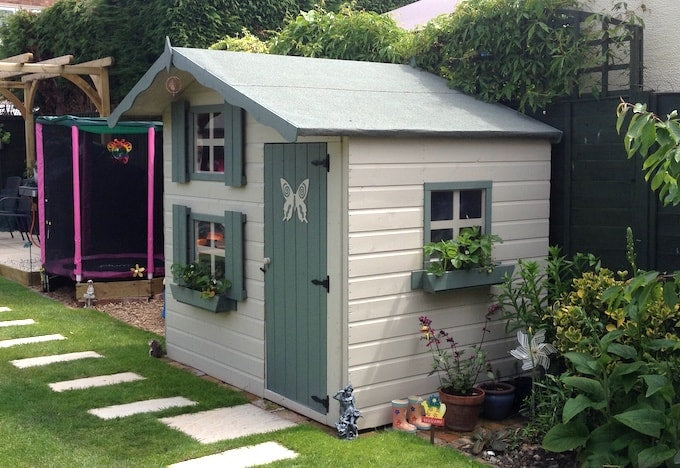
Customer image: James Cargill's Waltons 7 x 5 Snowdrop Wooden Playhouse with Loft
Now to plan the layout of your playhouse. The more furniture you want to include, the more detailed your plan will need to be. For example, if the playhouse is more about imaginative play, you’ll need to leave space for the kids to keep rearranging the furniture. But if you’re thinking of something fully-furnished, here are some methods to help you:
- Paper. Make a scale drawing of your empty shed. You can get the children involved in planning what it will look like at this stage. On the drawing, you can move around small, cut-out, scale versions of their furniture and storage units.
- Google Draw. Google’s free software will let you create a scale version of their playhouse and its potential contents. It will let you quickly and easily adjust sizes and positioning.
- Room Planning Software. Floor Planner or Sketchup are our two favourite tools. You can work in 2D or 3D by plugging in your shed’s dimensions and adding furniture and equipment.
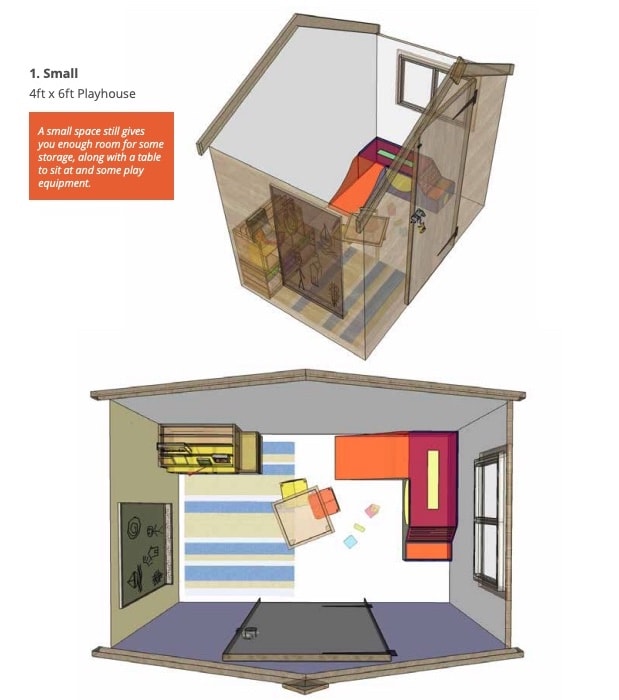
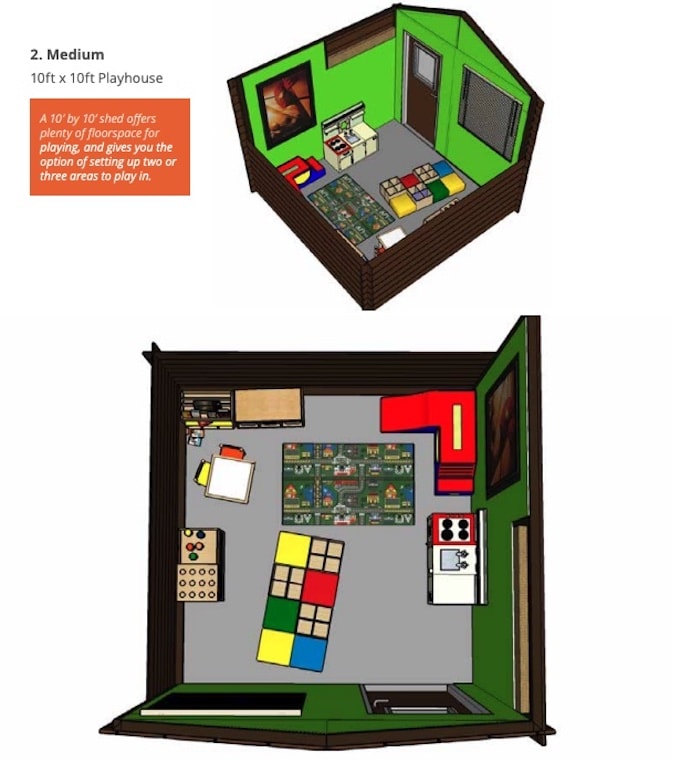
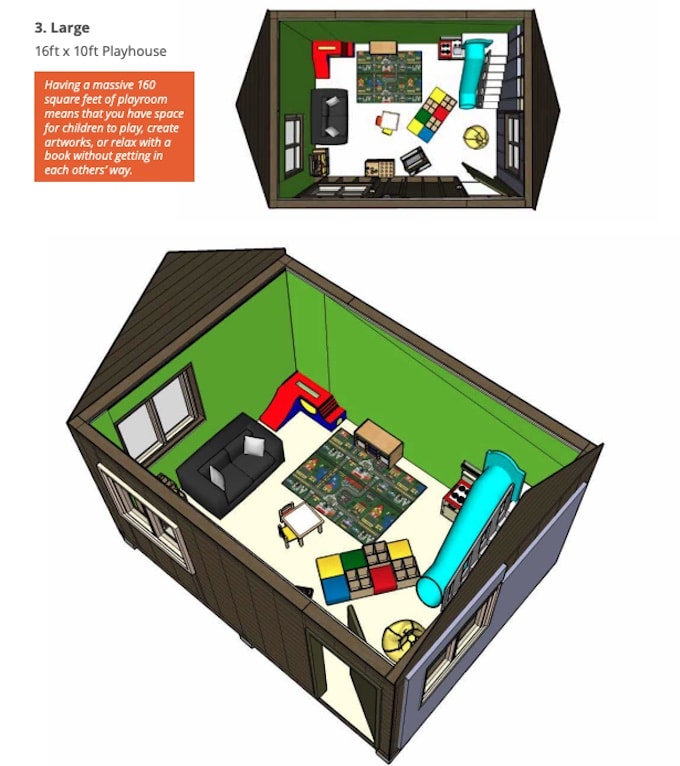
If you can’t fit everything you want inside your existing shed then trim your wish list or plan for a bigger shed. Here are three example playhouse layouts (made with Sketchup) for different sized sheds:
Should you convert an existing shed or buy a new one?
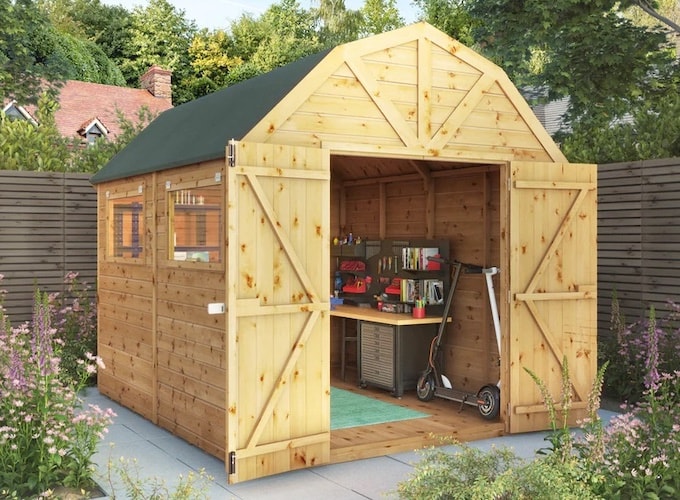
Image: 10 x 8 Premium Shiplap Dutch Barn from Waltons
Now you know exactly what you and your children want, it’s time to see if your existing shed will make a good playhouse. Empty it out and check for maintenance issues like water leaks, any visible damage or subsidence. Do the windows and doors work properly? Can they be opened easily and safely by small children? Is the roofing felt still intact? Any issues of this nature should be dealt with before the conversion begins.
Take a look at the condition of the shed itself. Are there any rough areas that could cause splinters on the door and window frames? A quick sand will remove these, and make the playhouse child-friendly and splinter-free. It will also help the paint or stain take better when you decorate. Interior walls are unlikely to need sanding, even if the surfaces are rough. When you insulate the shed, you can cover the insulation with plywood.
If you’re converting an existing shed, check what kind of base it has. Will the playhouse hold heavy gear, like a pool table for teens? If not, look into installing a stronger base, such as paving slabs or concrete.
If you’re buying a new wooden shed, order the biggest size your garden and budget will allow. An apex roof allows you to install overhead storage racks for any bulkier toys while a pent roof might be a better choice if the playhouse will be positioned in a narrow space or leaning against a fence or building. Just make sure to leave room to move around it for construction and maintenance.
How to project manage your shed conversion
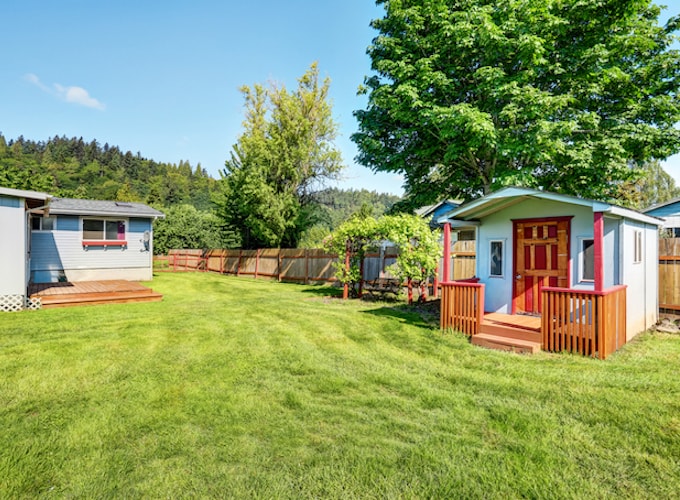
Image: Shutterstock
Now it’s time for some project management. Experience isn’t necessary if you follow this simple DIY process:
- Create a spreadsheet and write a list of every job that needs doing.
- Add columns for: How long each job might take; who’s doing the job (you or professional)
- Put the jobs in the approximate order that you think they need to be done.
- Add and label more columns for: day 1, day 2, day 3, etc. (up to 20 days, or however many you need). Day 1 is the day that the playhouse conversion starts.
- For each job, shade the corresponding cell for the day you will work on it.
- When you know the date that the work will start, swap out “day 1” and “day 2” with the actual dates. This spreadsheet will help you track your progress and make sure you have supplies and contractors for the right days. We’ve created a free project management template that you can copy for your own planning.
10 steps to convert your shed into a new playhouse
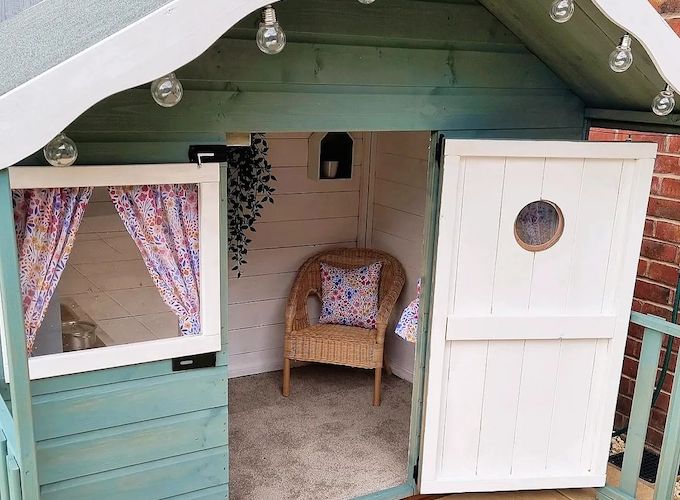
Image: @ournewwarwickhome
If your children are old enough, involve them in the process. Give them ownership of some of the easier jobs like picking out the colour they want and painting the shed, or helping to organise the storage. They’ll want to have a say in what’s in the playhouse and how it looks.
1. Damp-proofing
A few simple measures will help prevent damp spreading in the playhouse:
- Remove or cut back any shrubs or bushes that touch the outside of your shed.
- Keep the roofing felt in good condition.
- Install a damp-proof membrane, if you choose a solid concrete foundation.
- Use liquid wood or an expanding, hardening foam filler to seal any gaps around the window and door frames.
- Fit a vapour barrier or a breathable membrane when insulating the shed walls.
- Install heating.
If damp is still an issue, use a dehumidifier. If you don’t have electricity in the playhouse, use an extension cord from your house into the shed to power for a few hours at a time.
2. Insulation
Insulating your shed will help to keep the playhouse in good condition. It adds another layer of protection against damp for any toys or books your children will keep in there. It provides some soundproofing as well, which is helpful if your kids are planning to use the playhouse for practising musical instruments.
Try to insulate the walls, floor, and ceiling for maximum effect. The insulation should then be covered with ply, plasterboard or tongue and groove. These are some of the best ways to insulate your shed:
- Glass and mineral wool (also known as fibreglass or rockwool respectively) comes in rolls, which can be cut to size and easily installed. It offers good thermal insulation and soundproofing for walls and ceilings. When installing, cover your eyes, mouth and nose properly, and wear gloves.
- Foam insulation boards (e.g. from brands like Kingspan and Celotex) are expensive but highly thermally efficient. Each board must be cut to size to allow for sockets and wiring. The boards can be used for floors or walls.
- Sheep’s wool or hemp are breathable options for ceiling insulation. Just be sure to leave a gap between the insulation and the roof to let moisture escape.
- A breathable membrane topped with a carpet off-cut or rug is a cheap, make-do measure for the floor.
3. Electricity
Even if you’ve got the skills and experience, it’s best to enlist a qualified electrician for specialist work. You’ll need to have it signed off by a professional for insurance purposes anyway. Work out how many power sockets and light switches you want in the playhouse along with a list of your electrical requirements (heaters, lights, etc).
If you’ve decided to go without mains electricity in the playhouse because it won’t be used much, consider solar or wind power instead. However, solar power is less reliable than access to mains electricity, especially during the winter months when artificial light is most needed.
4. Lighting
While the playhouse is being used by younger children, your lighting needs will be less as the shed will mostly be used during the daytime. However, future-proofing for when they’re teens is always a good idea.
If you choose not to install electricity, battery operated, wall-mounted push lights are a great choice. They are cheap to buy and maintain, and require only a nail or hook in the wall to hang. Kids can easily switch them on and off - as long as they’re installed in easy reach.
But if you’ve wired the playhouse, you can choose from fluorescent, halogen, or LED lighting. Lamps are another cheap option and can be moved anywhere. But, depending on the age of your children and how raucous play is likely to get, these might not be the safest choice.
5. Heating
Properly heating your children’s playhouse will help make it a comfortable place to play, no matter what the time of year. It’ll also protect their books and toys from getting damp. Provided your shed is well-insulated, it shouldn’t be too expensive to keep the temperature above the dew point - the point at which moisture condenses on cool surfaces. There are several heating options available:
- Tube heater: Plugged into a wall socket, these thin heating tubes take up little space. They’re cheap and safe to run.
- Underfloor heating: Maintains an even, steady temperature across a shed. It’s costly to install, but often requires less energy than standalone heaters. There are no exposed heating elements, however, making this a good choice for those with younger children. But be aware, any maintenance issues can mean you have to take up the floor.
- Electric heater or portable radiator: Good for a quick blast of heat and safe to run, but not very efficient.
- Halogen heater: Reasonably cheap to buy and run, but the front grille can get very hot, so may not be appropriate for children rough and tumbling.
- Electric radiator: Safe, convenient and cheap to run. But, they are wall-mounted and so take up precious space.
- Electric convection heater: Either freestanding or wall-mounted, these are cost effective to install and maintain. Can feature thermostats and timers so you can make sure the playhouse is a good temperature before they go to play.
The electricity-free options, such as gas and paraffin heaters and wood stoves, aren’t safe for use in a children’s playhouse. But solar-powered air heaters could be an alternative, especially if the kids won’t be playing in there after dark.
6. Internet
If you want the playhouse to have internet access, there are a couple of ways to connect:
- Home WiFi: But the further the playhouse is from the house, the weaker the signal.
- WiFi Extender: This can extend the reach of WiFi signal up to 30 metres.
- Tethering laptops to mobile phones and using their mobile’s signal and data is easy, but can be expensive.
- Powerline Adapter: This creates a second network, built on your home’s existing connection. It does require your mains electricity to extend to the playhouse. Once set up, an adapter plugged into a socket in the shed is the source of the new WiFi signal.
7. Water
For a low-tech way to give your children access to water for their painting and crafting (but not for drinking), install guttering and a water butt. It’s easy to fit, and many water butts come as a kit.
This solution has the added bonus of draining the water away from your playhouse’s roof, further protecting the structure from damp.
8. Security
If your children are storing gaming equipment or anything else of value in the playhouse, you need to take security measures. These are some to consider:
- Laminated glass windows that won’t smash if they get hit with a stray football.
- Alarm wired into your home burglar alarm system.
- Motion-sensitive security lights to put off would-be thieves and help you in the dark.
- Curtains or blinds to conceal your valuables.
- Strong locks and a reinforced door. A standard shed door wouldn’t be challenging for a thief to get around. Consider reinforcing your shed door with sheet metal, especially the area behind the lock.
- Garden. Make the garden difficult to get into, and burglars will be deterred.
- Hinges. Use coach bolts with rounded heads to secure your hinges. Anything less, and potential thieves will simply unscrew the hinges of your doors and windows, making your other security measures pointless.
- Finally, make sure your shed and contents are insured.
9. Storage
Clever storage solutions will maximise the amount of toys and games your children can keep in the playhouse, as well as giving them more space to play in. But for young kids, remember to keep it at a low level so they can reach everything themselves. Here are some ideas to think about:
- Stackable, clear plastic boxes. Cheap, damp-proof, and easy for kids to see what’s inside each one.
- Thin, plastic storage boxes on wheels that can be stored underneath a play table.
- Buckets hanging from the wall, storing miscellaneous items like lego or pens.
- Shelves for books, blocks and other items. Or old wooden crates, painted and affixed to the wall.
- Pegboard for hanging hats, clothes or small shelves or magnetic toolbars for toy cars or other metal toys.
- Plastic hanging baskets for storing stuffed animals.
- Old laundry baskets or vintage suitcases for fancy dress clothes.
- Rolling cube tables. Ideal for a playhouse shared by multiple children. These can be pushed together to form one table or rolled apart for different activities. Each child can have their own, with their toys/art materials/ books inside each one. As the children grow, the cubes can go from being tables to being chairs.
- Storage benches are a great option - just take the bench cushion off and they have a pretend dining table or the plank of a pirate ship. Put the bench cushion back on, add a few more cushions, and you’ve got a great place to sit and read.
10. Decoration
Decorating the playhouse is a great task to involve your children in. What colour do they want to paint it? Do they have a playhouse name picked out that you could stencil above the door? Much of the decoration will be specifically tailored to their favourite colours and activities, but here are some ideas to get you started:
- Bright colours. Painting the walls with your childrens’ favourite bright colours will help to keep a happy atmosphere in the playhouse.
- Blackboard wall. Cheap and easy to do with a few coats of blackboard paint. Provide a big box of coloured chalk and a rag for cleaning.
- Magnetic wall. There’s hours of fun to be had rearranging letters, words or shapes on a magnetic board - and it’ll free up the front of your fridge! A sheet of galvanised steel, or even a metal cooker backsplash will do the job easily.
- Stencils. Can be used inside or outside, showing favourite animals, shapes, or the letters of your children’s names. Make your own, or buy pre-made.
- Shopkeeper mural. If there’s space to set up a pretend shop counter, a painting of shelves stocked with tins and packets brings life to a game of ‘shopkeeper’.
- Vinyl wall stickers. Easy to remove and replace as childrens’ tastes change.
- Bean bag chairs. Comfy to sit on, and stackable to save space.
- Reading corner. Add a fluffy rug, a bean bag, and book storage.
- Bunting or flags. Pirate flags or bunting add character and colour to any playhouse.
- Picture bunting. Hang their own artwork (using clothes pegs) from ribbon strung across the playhouse.
- Rugs for warmth, colour and comfort. Or carpet offcuts (if the playhouse’s activities will be messy). Floors can be painted wood, or easy-to-clean lino.
- Colourful curtains or blinds will add warmth and cosiness to the playhouse.
- Welcome mat makes it feel homely, as well as keeping some of the worst dirt outside.
- Floor games like Twister or a chessboard painted on the floor make it easy for kids to play with minimal setup.
- Window boxes or potted plants for greenfingered children will add life and colour to the playhouse.
Then get your kids to move in as many books, toys, art materials and blankets as they’d like. The only limit is their imagination. If you’ve done your planning properly, there’ll be plenty of room for the pretend kitchen, shop counter, car track and space station.
How to create a playhouse - quick summary
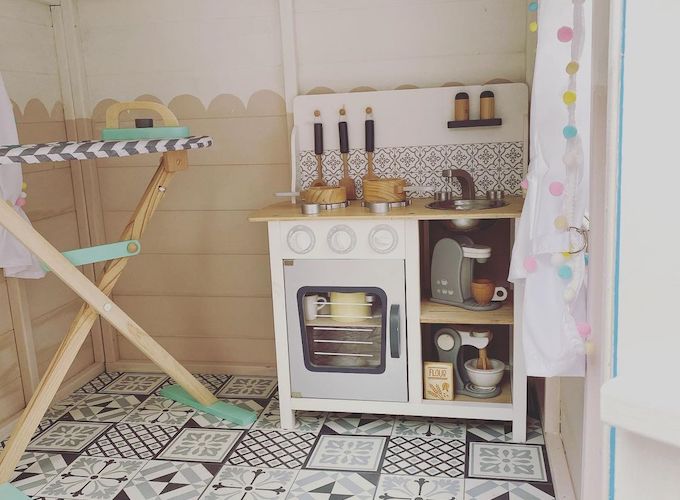
Image: @theprentwistles
- Start planning the main uses for your playhouse.
- Work out the size and layout of the playhouse.
- Assess the state of your current shed and its location.
- Make a job list with dates. Be clear which jobs are for you (or your kids) or professionals. 5. Start by damp-proofing the shed.
- Insulate the floor, ceiling, and walls, and cover with ply, tongue and groove or plasterboard.
- If needed, install electricity via mains, solar or wind power.
- If needed, install lighting. Choose from battery-operated push lights, or mains-operated fluorescent, halogen, LED or lamps.
- Install your choice of heating from solar air heaters, tube heaters, underfloor, portable radiators, or convection heaters.
- Connect your shed to the internet via your home WiFi, tethering to a mobile, or powerline adapters.
- Install guttering and a water butt, or connect to mains water.
- Secure the shed.
- Install your storage.
- Decorate the playhouse with your children, according to their tastes. Then move in all the toys, games, and books they’ll need.
More help
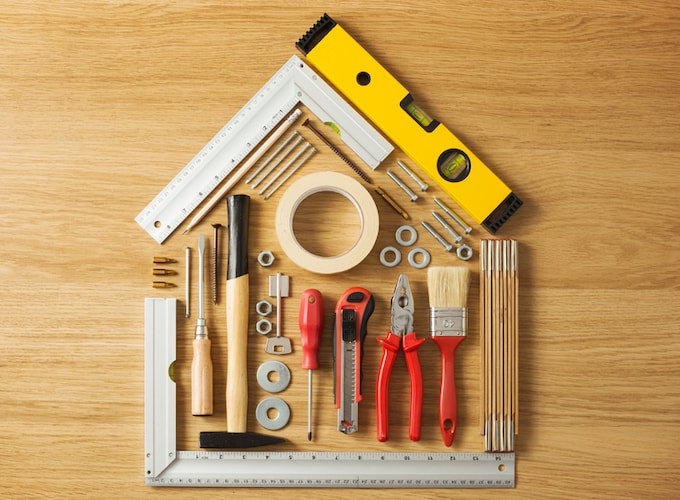
Image: Shutterstock
You should now be ready to convert a new or existing shed into a playhouse. Planning is the most important stage. Be sure to use professionals for plumbing and electrical work to ensure your project conforms to building regulations.
Additional resources
- Get a solid foundation with our how to build a shed base guide
- Waltons help pages
- Waltons how-to guides
- Waltons blog
Visit waltons.co.uk if your existing shed isn’t quite right for your new playhouse. Take a look at our purpose-made wooden playhouses while you’re there, to see if your dream den already exists. If you need any advice, our expert team is here happy to help. Call us on 0800 029 1000.
Lead image: Ginger & May
Share:
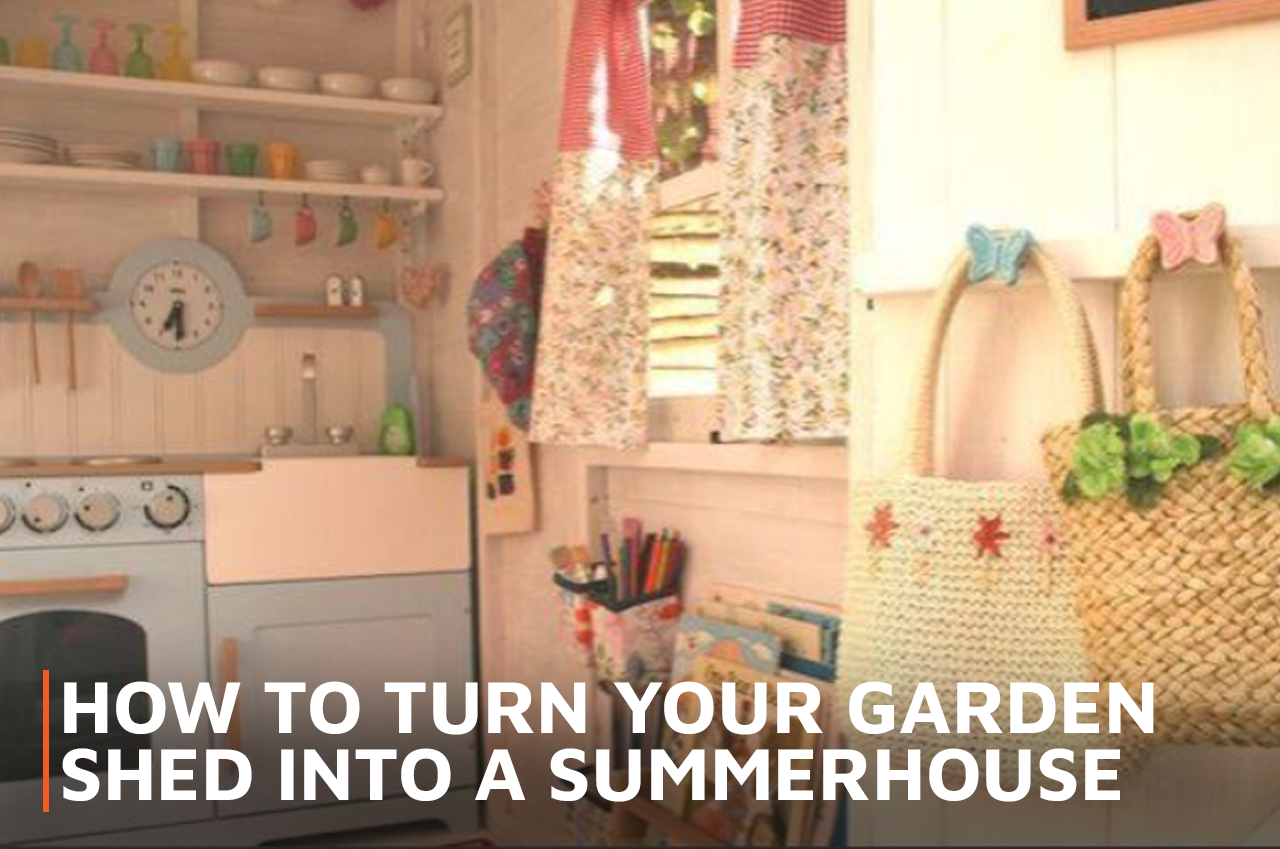
How to turn your garden shed into a summerhouse
How to turn your shed into an office