


Your shed or outbuilding is only as good as the foundations you build it on. This Waltons guide helps you decide which base is right for you and provides step-by-step instructions to walk you through the build.
Replacing an existing garden building? Browse our extensive range of wooden sheds and workshops for inspiration.
Contents:
- Why do I need to install a base?
- Shed location
- Shed base options
- Installing a portabase
- Installing a paving slab base
- Installing a concrete slab base
Why do I need to install a base?
A base provides a sturdy, level platform for your shed, and prevents rot by stopping groundwater seeping into the bearers.
Install your shed on an uneven surface and the timbers will flex. As a result, screw holes and joints may not line up, and once you’ve assembled your shed, you might find the doors and windows don’t shut properly.
A sturdy base also stops your shed subsiding over time, helping it last longer. Using floor bearers to raise your shed a few centimetres from the base will also help to protect your shed from damp by allowing air to circulate.
Shed location

Image: Waltons
Before you decide where to build your shed, think about the following points:
- Terrain: Level the site. The flatter it is to begin with, the easier the job will be.
- Access: For ease of access during construction and for maintenance afterwards, including regular wood treatment, try to leave a 3ft gap between your shed and any surrounding walls. This also lets the building ‘breathe’, reducing damp and the potential for rot.
- Natural light: What will you use your shed for and how much natural light do you want or need? Site your shed accordingly – remember – direct sunlight soon turns a shed into an oven.
- Electrical supply: If you plan to install electricity, take the location of the supply into consideration when choosing your site. Alternatively, take a look at our quick guide to powering your shed off-grid.
- Planning permission: Most sheds don’t require planning permission, but if you’re not sure, our guide to planning permission contains plenty of useful information as well as links to the relevant planning bodies.
Shed base options
Once you’ve chosen a site, you’re ready to choose a base. Here are your options.
1. Portabase
 Suitable for garden sheds and playhouses. Install a Portabase on a concrete surface, or straight onto the ground.
2. Paving slab base
 Suitable for all garden buildings. Concrete paving slabs are long lasting and easy to install, as long as you prepare the ground properly.
3. Concrete slab base
 Suitable for all garden buildings. A concrete slab is the most permanent option. Employ a builder if you’re not confident with DIY.
Installing a Portabase
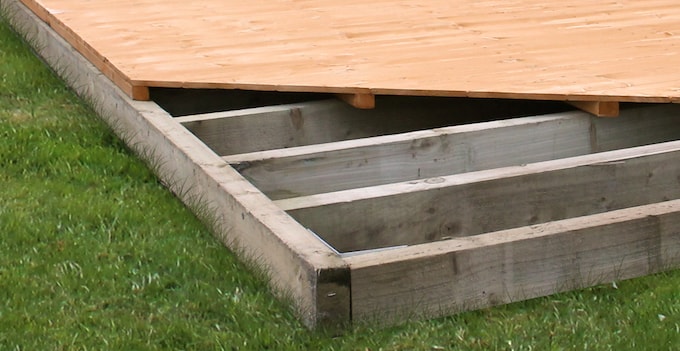
Image: Waltons
The Portabase is a time and cost-effective base that is purpose-built for garden sheds. Manufactured from pressure-treated timber, the Portabase provides a rot-resistant platform for your shed. Because it’s supplied with both ground spikes and metal support brackets, a Portabase is equally suitable for garden lawns and hard surfaces.
What you’ll need:
- Portabase kit
- Electric drill and screw bit
- Tape measure
- Spirit level
- Hammer
Portabase installation process:
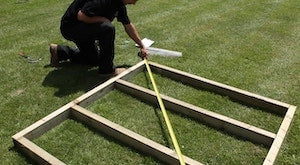
Step 1: Level the ground ready to receive the Portabase. Arrange the shorter, cross-pieces on the ground, narrow side down. Cap the ends with the longer timbers to form a grid.

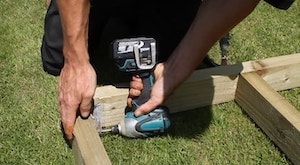
Step 2: Mark the capping timber where the cross- pieces are to be secured to it. Drill two holes at each point.
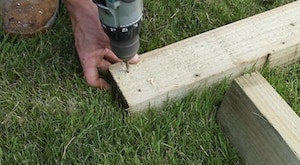
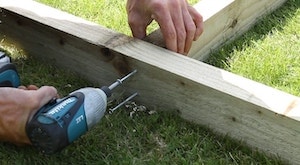
Step 3: Screw the cross-pieces to the capping timbers using the screws provided. Drill pilot holes to prevent the timbers from splitting.
Step 4: Measure the diagonals. If the base is correctly aligned, both will be the same length. If they’re not, secure one corner, then with your hammer, gently tap the frame into alignment.
Step 5: Securing the base. Take each galvanised metal spike and place it flush against the wood inside a corner of the frame. Hammer it into the ground. If you’re installing the Portabase onto solid ground like a patio, follow the instructions provided with the base to attach the metal foundation frame.
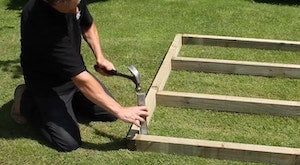
Step 6: When the top of the spike is level with the frame, screw it to the wood.
Step 7: Place an L plate against the inside of the capping timber close to each of the corners. Hammer the plate to flatten it against the ground until the top is flush with the timber. Screw the plate to the frame. Repeat for each corner.

Step 8: Use your spirit level to make sure the frame is level. If it’s not, hammer the corner spikes further into the ground as required.
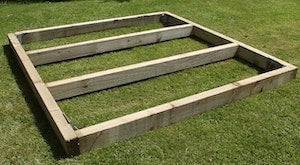
You now have a stable, level base on which to build your shed.
Installing a paving slab base
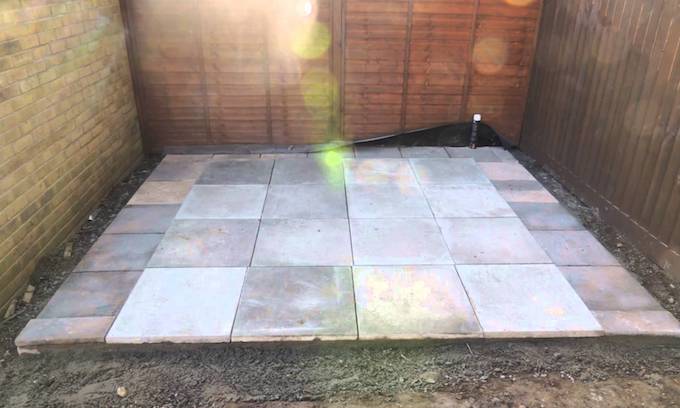
Image: Waltons
Concrete paving slabs make an ideal base for a range of garden buildings. As long as the ground is properly prepared, this is a long-lasting, durable option.
What you’ll need:
- Concrete paving slabs
- Hardcore
- Slab fix mortar
- Tape measure
- Set square
- String and pegs
- Spade
- Rake
- Earth rammer
- Spirit level
- Watering can
- Slab spacers
- Rubber mallet
- Brush
- Trowel
Paving slab installation process:
Step 1: Level the site, then using the tape measure, pegs and string, mark out the area for the base. Use a builder’s set square to check each corner is a 90-degree angle. To create a patio area or walkway around your shed or summerhouse, mark out a correspondingly larger area.

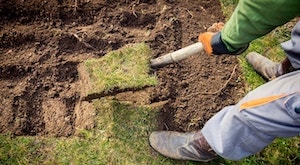
Step 2: Remove the turf inside the perimeter, digging out the topsoil to a depth of 10cm for the hardcore, plus 2.5cm for the slab fix mortar, plus the thickness of your paving slabs. Your paving slabs should sit just below the level of the surrounding turf.
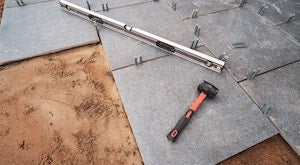
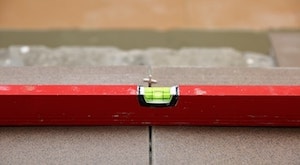
Step 3: Lay the hardcore, rake it level and compact it with your earth rammer. Use your spirit level to check the surface is level. An uneven or sloping base will weaken the structure of your shed.

Step 4: Starting from one corner, practise-lay the patio slabs to make sure they fit properly. Leave a gap between each slab using off-cuts of ply or patio slab spacers. When you’re happy with the layout, remove the slabs and stack them to the side.
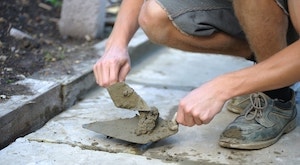
Step 5: Spread the slab fix mortar to a depth of 2.5cm. Rake it level, sprinkle with water from a can and rake it level again.
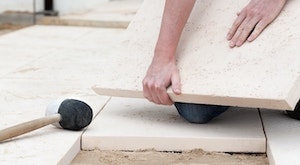
Starting from one corner, lay the concrete slabs, inserting spacers between them. Bed each slab by tapping it with the rubber mallet, remembering to check each one with the spirit level.
Allow up to 48 hours for the slab fix mortar to harden.
Step 6: Remove the spacers. Sprinkle dry mortar over your shed base brushing it into the gaps between the slabs.
When the gaps are full, brush away any excess mortar, then with a trowel, press the sand / cement mix into the gaps.
Now wet the surface with water sprinkled from your can. Allow to dry – your shed base is ready.
Installing a concrete slab base

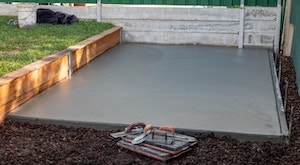
A concrete slab is the most permanent shed base, offering a sturdy foundation or a solid floor for heavy equipment. Installing this base requires that you have at least competent DIY skills. If you’re unsure, we suggest you consider hiring a professional.
What you will need:
- Sand and cement (or ready mixed concrete)
- Tape measure
- Pegs and string
- Set square
- Spade
- Hardcore
- Rake
- Earth rammer
- Timber
- Cement mixer or mixing board
- Wheelbarrow
- Tamp board
- Spirit level
How much concrete will I need?
Use the following equation to work out how much concrete you’ll need:
Slab depth x Slab width x Slab length
Round decimals up and add 10% contingency – it’s better to have too much concrete than not enough.
Concrete slab base installation process:
Step 1: Level the site then using the tape measure, pegs and string, mark out the area for the base. Use a builder’s set square to check each corner is a 90o angle. Check you have the angles correct once you have the pegs and string in place.

Step 2: Remove the turf inside the perimeter, digging out the topsoil to a minimum depth of 10cm of hardcore, plus 15cm of concrete. Add the hardcore, rake it level and compact it with the earth rammer.
Step 3: Next, you’ll need to build a timber frame to contain the concrete while it sets.
Measure, cut and join the timber, constructing the frame so that the inside measurements match the dimensions of your base.
Measure the diagonals. If they’re the same, your base is square, if not, tap the frame into alignment with a hammer. Use a spirit level to check the frame sits level on top of the hardcore.

Step 4: Mix the sand and cement, and add water in accordance with the manufacturer’s instructions. Once you’re happy with the consistency of your concrete mix, pour it into the timber frame and start to spread it evenly.
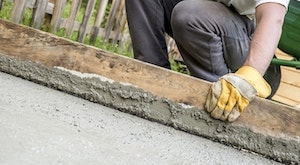
Step 5: Spread the concrete within the space until it slightly overfills the frame.
Take a straight-edged length of timber, long enough to span the width of your slab and beginning at one end, work it across the surface of the concrete, using a sawing action.
Use a spirit level to ensure you have a level surface.
Step 6: Wait for the concrete to set. If it rains, cover it with plastic sheeting. In warm weather, prevent cracking by covering the surface with damp cloth – dust sheets or sacking work well.
Leave your concrete base to rest for at least three days before removing the timber frame, and installing your garden shed on it.
We hope this has given you all the information you need to build a strong foundation for your shed. Not only will a sturdy, level base support the structure, it helps to prolong the life of your garden building. For more practical how-to guides including advice on building, maintaining and decorating your shed, visit our blog.

Share:
How to heat a garden building in the winter
Waltons ultimate shed maintenance guide