


There’s real satisfaction in seeing a brand new garden building, ready for use. But it’s important to make sure it’ll last. From base to apex, our shed maintenance guide tells you how to prepare and maintain your shed for a long and useful life. There’s even a handy maintenance checklist at the end to help keep your existing shed in good shape!
Is your garden building beyond repair? Browse our extensive range of new wooden sheds and then put our maintenance guide to good use.
Contents:
- Essential maintenance
- Treating your shed
- Painting your shed
- How to avoid damp
- Basic repairs
- More help and resources
- Shed maintenance checklist
Essential maintenance
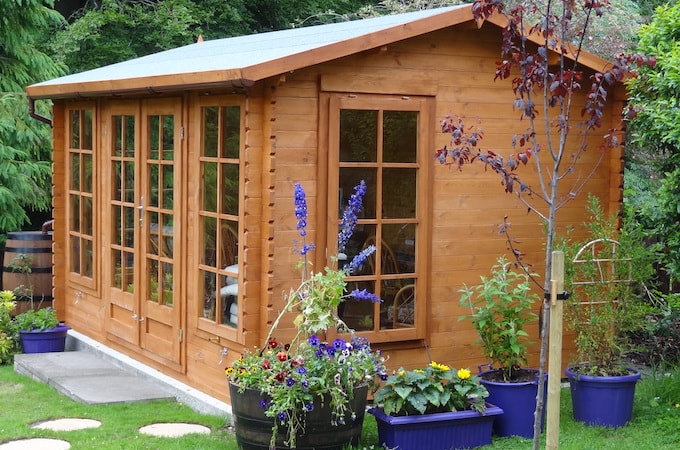
Customer image: Ian Owen
You should check your shed regularly for wear and tear, leaks and stability. But if you happen to notice something (like a crack in your roof felt, or a gap in your window frame) at any time, fix it straight away. Don’t wait for water to get in, or for weather damage to get worse. Make your base and your roof a priority.
The base is your top priority
All long-lasting garden buildings are built on a solid, level base - either concrete, slabs, or a pressure-treated wooden frame. Read our guide to building a shed base to get it right!
Many garden buildings can be bought with a wooden base, which is easy to construct. But it’s absolutely essential that this is laid onto level ground. If your garden building isn’t level and square when built, it will twist and warp with the natural movement of the wood, preventing the doors or windows opening and closing properly. Gaps may appear in the panels which will allow water in. At worst, the unstable building can crack!
Check your base is level in both directions and adjust prior to the build. Once your shed’s built, it’ll be very difficult to make changes here. Once your shed is in place, check annually that your base hasn’t moved, and that the void between the base and the bottom of the shed is clear of leaves and debris. Remove any blockages so that air can circulate freely underneath your shed.
Look after your roof
Your garden building is supplied with roofing felt which must be correctly fitted. Any single skin roof covering must be checked at least annually for tears, splits, cracks and deterioration caused by weathering and bird droppings.
Failure of the roofing felt will result in leaks and increased dampness in your garden building which should be avoided. Fortunately, it’s easy to fix - just check out our guide to repairing a shed roof here.
Treating your shed
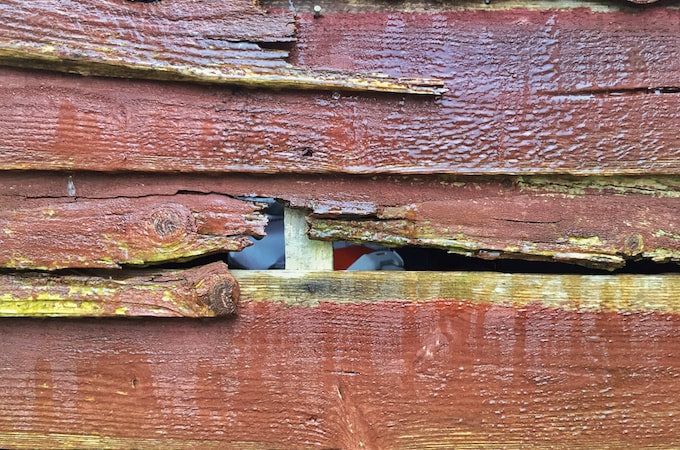
Image: Shutterstock
Treating wood - the facts
Preservation of wood that’s outdoors is vital. A little early care will help protect your shed, improve its appearance and ensure maximum longevity. Insects, moisture, salt, and changing weather can have dramatic effects on the stability and appearance of your shed.
Once your building is installed, you’ve checked it over and you’re happy with it, you can take a few basic precautions to prepare your shed for the elements and prevent rot, mould, splitting, warping, discolouration, infestation, and ultimately, product failure.
Wood treatments prevent decay and, by repelling water, discourage the growth of moulds and fungi that could jeopardise the structural integrity of the wood. Waltons dip-treated sheds come with a 10-year anti-rot guarantee, but your new shed must be treated with a coat of wood preservative as soon as it's installed and annually thereafter.
Log Cabins are not pre-treated - you must use a spirit based treatment as soon as it’s up, and annually thereafter to keep the guarantee. If you opt for a pre-painted garden building (Waltons offers a pre-painted service), you can usually wait longer before re-treating, as the paint used is protective, but after a time - usually three years, with the occasional touch-up - it’s essential to re-paint or treat your building.
- Preservative is a chemical application that prevents decay, deters insects, and prevents the growth of fungi and bacteria. Preservatives are usually spirit-based.
- Water-based treatment is the next most common method. Refreshed every 6-12 months, it’s an effective barrier against the elements, but doesn’t generally prevent insect attack.
Treating wood - the process

Image: shutterstock
We recommend that you treat your garden building regularly with a good quality preservative before painting. To apply a preservative/treatment, follow the manufacturer’s instructions but in principle, stick to the following steps:
- Wear latex or rubber gloves, eye protection and (if spraying) a mask.
- Prepare the wood, by sanding down any ridges or inconsistencies in the wood, smoothing out knots and end-cuts.
- Using a clean brush or rag, make sure the wood is clean, dust-free and fully dry.
- Choose a dry day to treat your shed. If you’re spraying rather than brushing paint on, avoid a windy day.
- Be sure you can safely reach all the sections you need to paint - and if you need a ladder, make sure it’s safely positioned before climbing. Lay dust sheets around your shed to avoid paint splatters on your base or surrounding plants
- Tape around window panes to avoid smears when you’re painting the frames.
- Keep pets and small children out of the way. The last thing you want is to have fur on your shed paint, or little painted footprints all over your garden and home.
- Fill any gaps in the shed’s body with caulk to prevent water and draughts from getting in. Silicone based caulk is flexible, and will move with your shed’s timber when temperature and humidity change. Allow to dry completely before treating. A handy tip for finding gaps is to go into your shed and look for light leaking through joins and frames. If light gets in, then so will water.
- Liberally apply at least two coats of the treatment with a brush or spray, taking care to allow the first coat to completely dry before applying the second.
- Make sure the solution permeates the whole of the surface area, especially around natural cracks, end cuts and nail/screw holes.
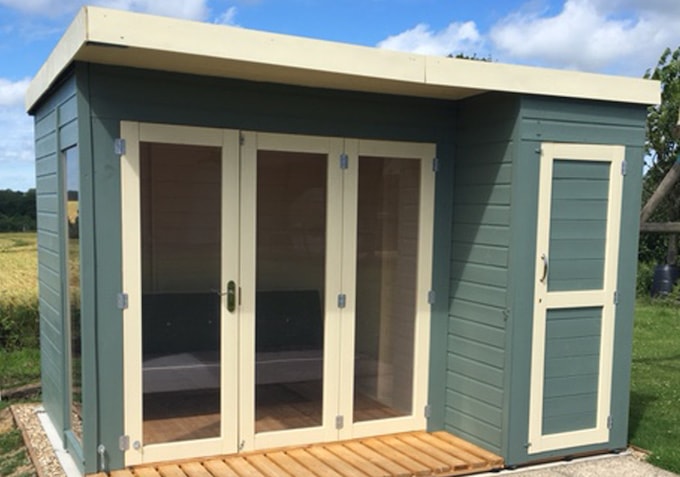
Painting your shed
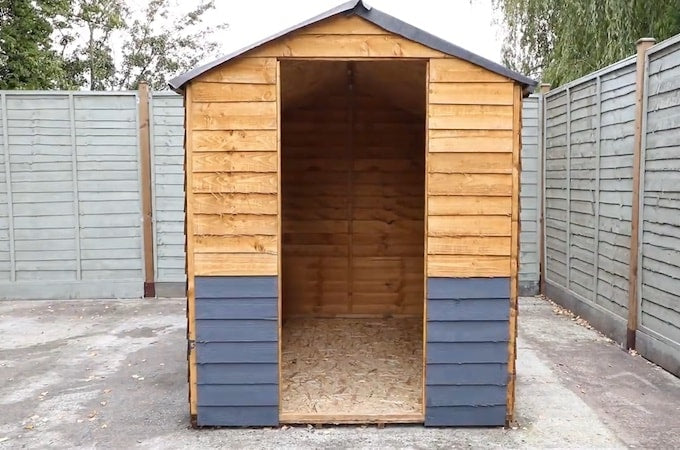
Image: Waltons
For a cleaner, more modern look, find a hardwearing outdoor paint in a great colour, and paint your shed. It lasts longer than natural stain, and is more customisable to the look you really want to get.
Start by removing fascias, end trims and any metalwork. This will help you get a better looking finish, and you can paint trims and fascias a different colour to make your building look even better! See our ‘How to paint a shed’ video for some other tips.
In a coastal area, you do need to take extra precautions to maintain the wood, due to high humidity and salt levels. Check that any treatment you apply is robust, and offers protection against salt.
Make sure all of the timber is painted to give you the best protection. Apply at least two coats of primer/paint to make sure your garden building is completely protected from the elements.
Once everything’s painted, re-assemble your new-look shed. Keep an eye on the finish, and if over time paint peels or flakes, make sure you touch up or re-paint to keep the wood protected.
You don’t need to paint the inside of your shed for maintenance purposes, but if you do, you’ll have a garden building to be prouder of, and that you can more happily spend time in. Painting the inside of your shed can also help to protect the timber against condensation.
How to avoid damp

Image: Waltons
Your new garden building will be watertight as long as you’ve constructed it on a flat, level base, following the instructions, and given it the appropriate treatment. However, if, over time, you spot damp creeping in, deal with it quickly.
If the damp is caused by a failure in the roof felt or a gap in any frames, then fix this immediately – it’ll only get worse. If you have rising damp, then find the cause. If it’s coming up through the base, fit better drainage (guttering, or a French drain).
There may be leaves and debris between the base and the shed floor which you must clear out. Use a pole to push any material that’s gathered here so that air can circulate.
Replace any timbers or floor panels that are very damaged. Allow any damp sections to dry before redecorating or re-treating with preservative.
Your garden building is rain-proof when built, but constant exposure to water can cause problems. Even if your garden building has been treated, it’s only a semi-permanent deterrent. Here are some ways to help stop damp taking hold:
- Guttering – When you install your garden building, a guttering and water butt system will make sure that any water that runs off your shed roof will be directed away from the surrounding ground and base, helping to prevent puddling and rising damp. Guttering is a cheap and straightforward way to protect your shed from water dripping from the roof onto the floor.
- Insulation – When the temperature falls below the dew point, humidity in the air condenses, potentially damaging your shed and its contents. Insulation stops heat leaving your building, making that less likely to happen.
- Sealing windows – All Waltons shed windows are designed to fit well, but over time and with the movement of wood, small gaps can appear. Help to prevent this by sealing your windows with a silicone sealant. You can do this either when you build your shed, or to an existing one. Watch our video guide to sealing shed windows for tips.
- Watertight frames – Make sure any gaps in your window and door frames, however small, are filled as soon as possible. Use silicone or expanding foam to seal gaps, and cut off any excess with a knife.
- Ventilation – Even when your shed is watertight, damp can creep in on cool and humid days. Install vents in your shed so that air can circulate through. Having enough airflow through the shed means that moisture won’t build up. Windows or static vents will help airflow, but electric fans will guarantee that air is kept moving. For more information on shed ventilation, read our ‘How to ventilate a shed’ guide.
Basic repairs
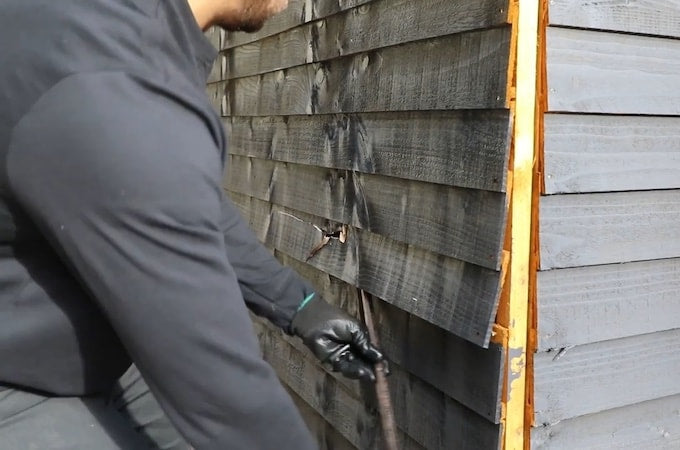
Image: Waltons
A broken panel doesn’t mean the end of your shed! You can buy new panel (sometimes it’s best to replace panels above and below the broken one too), and in less than a couple of hours, you can have the job done.
Replacing overlap panels:
- This is a straightforward shed repair job. If you have a broken or rotted overlap panel, first remove the trims at either end.
- Then, just prise the board off with a screwdriver, and remove any protruding nails.
- Once this is done, cut your new panel to length, and simply nail it in, with the top edge comfortably underneath the panel above. Replace the trims, and you’re done!
- Check out our video guide to replacing overlap panels for the full low-down.
Replacing shiplap panels:
- Remove trims, then knock the broken board out from the side. Use a block, so you don’t hammer straight into the board.
- Replace more boards if there’s been swelling due to damp.
- Cut each replacement board to length before sliding into place. Nail to the framing.
- There’s a full guide to replacing shiplap panels on the Waltons website which includes a video.
More help
Customer image: Jon Aves
Visit the Waltons help pages or the Waltons blog for advice, tips, and all things sheddie.
Additional resources
- Get a solid foundation with our how to build a shed base guide
- Waltons help pages
- Waltons how-to guides
- Waltons blog
For new sheds
Visit waltons.co.uk if you want a new shed. If you need help finding a new shed, just call our friendly sales experts on 0800 029 1000.
SHED MAINTENANCE CHECKLIST
Print out this checklist and use it to help identify any potential problem areas in your shed, summerhouse, log cabin or playhouse. If you find any issues, deal with them quickly - otherwise they’ll get worse.
For new sheds, always make sure your installation is sound, and that you’re happy with your garden building before undertaking any modifications.
Outside
- Check that the base is level, intact and free from rot.
- Make sure any paving slabs are securely in place and not loose or wobbling.
- Check that there’s nothing under your shed between the bearers preventing ventilation. If there is, clear it to prevent damp.
- Check the roof - is the covering secure, free from tears and wear, and properly fixed down?
- Clear any leaves and debris from the roof.
- Check that all the windows are intact.
- Check that the window and door frames are free from rot and weather damage.
- Check that you can get all the way around your shed. Is it clear from plants, tree branches, etc? Are there any plants or branches that look like they’re getting close?
- Check that all of the panels are secure and free from damage. Replace or re-affix any that are loose or broken.
- Apply wood preservative or paint to keep the shed’s timber intact, strong, and protected from the elements.
- Check that there are no obvious damp patches on the outside of the shed. If there are, find the source of the damp and make sure it’s prevented in future. Consider fitting guttering to your shed to direct water to a butt or drain.
- Are there valuables in your shed? Are the locks strong and secure?
Inside
- Check door and window frames open and close smoothly. Oil the hinges.
- Check all corners and joins. If you can see light through them, there’s a gap. Fill this with expanding foam to keep out rain and wind.
- Check that the floor isn’t too worn. If it shows signs of wear, replace or cover with board so you don’t put your foot through a hole. Consider putting down some old carpet or lino to protect it.
- Check joins and corners for damp. If it’s there, think about better protection from outside (wood treatment, better roof, guttering) and/or heating and ventilation inside, as well as sealing those gaps with silicone or expanding foam.
- How does it look? Tidy up and paint the inside of your shed for a better organised, better looking and more comfortable space.
Share:
How to build a shed base
How to install fence panels